I bought my table at a rummage sale 30 years ago. It wasn't for sale, but I asked the seller if she had a table, and she showed me an old, white and red enamel table tucked in her basement. After showing it to me, she hemmed and hawed, but finally let it go for $20. Money well spent!
 |
| My little Evan Marie (30+ years ago), licking the beaters beside the table. |
Years passed, and as we moved about we dragged that table with us (which had been used for myriad purposes) until it ended up here on the farm. Eventually it wound up in the basement, where it got covered in stuff for about ten years or so. Unfortunately, it also got rustier, as my basement is occasionally damp.
I thought about fixing it up on a few different occasions, but it wasn't until I needed a base to put a computer hutch on top of -- a place I could use as something of a "secretary" for my cards and writing supplies -- that the table really popped into the forefront of my mind. So I yanked it upstairs, and here's how the project went.
Now, mind you, I'm a far cry from being a perfectionist when it comes to projects like these, so the outcome probably could be improved upon, but I'm very happy with the results.
|
Rusty & Musty!
|
|
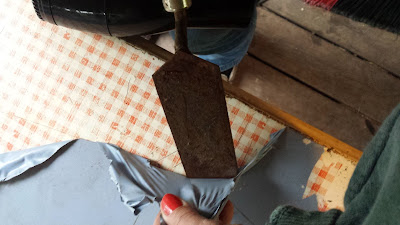
Go ahead, laugh at my tools! The knife beat a scraper, and I WISH I'd had a heat gun stripper, but I had to make do with a hair dryer. Hey, it worked.
|
 |
Last of the blue contact paper, and on to the red checked.
|
I didn't want to lose the "Seal of Quality" with the maker's identification, When it came time to paint, I took some of that poster mounting putty that you buy in little strips and molded it over the label. Worked perfectly! Peeled the putty off easily afterward. I did the same thing on the drawer knob, because I was having trouble removing it.
|
|
Silver metallic spray paint for the legs! They make everything nowadays.
|
|
Stripped down, sanded, wiped clean.
|
 |
|
Jeff, my hardware guy *heart* putting it all back together.
|
|
DRUM ROLL...
|
|
TA! DA! There she is! Isn't she pretty?
|
The table is comfortable in my upstairs "she room". This room used to be my daughter's. She got it in her mind a few years ago to remodel. I helped her strip and refinish the old painted floor (no hair dryer on that project!) and then she painted the walls in red (on the bottom) white on the top, and one upper wall black. It looks like an old fashioned school house. I love it, and my table looks perfect in there.
Now I have a pretty cloth on the table top for protection, and the upper half of my computer hutch sits on top, working as a secretary for all my stationary supplies.
And I'm on to a new project! I believe I'll soon be fixing up my vintage camper.


No comments:
Post a Comment